House and Garden Design
< House & Garden >
Here's an example of a home project I did a few years ago, and the variety of visual material I developed in planning and executing it. Having a degree in engineering came in handy for creating the working drawings used here.
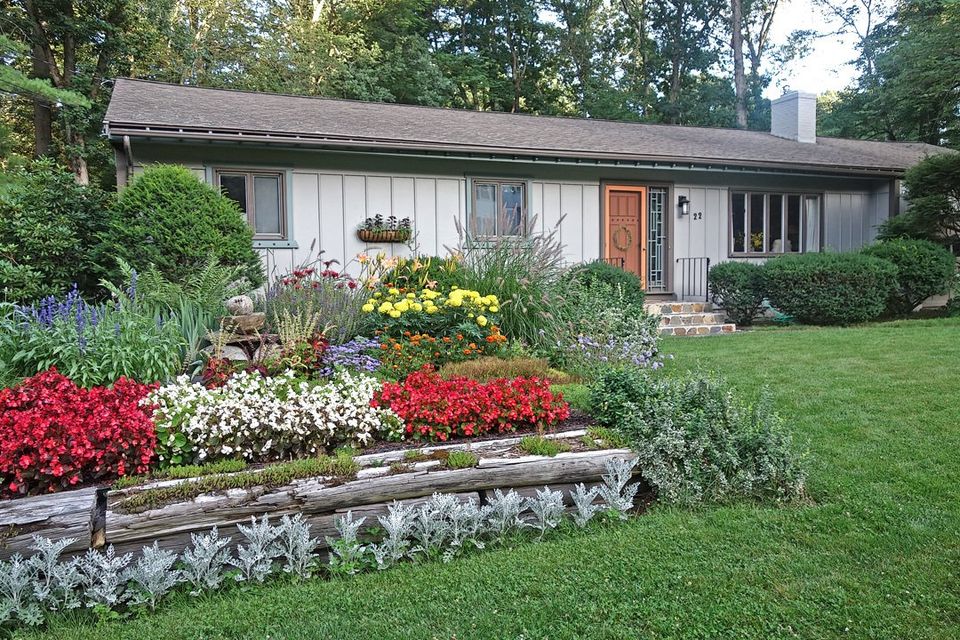
A lot of software exists for visualizing (rendering) how home improvement plans would look to the eye before commiting. For simplicity, I did this in Powerpoint as shown below. From a front photo of my house (top image), I created a 2-dimensional current state drawing that represented all the major components I was interested in (middle image). I then used this drawing to try out different design schemes and color choices until I found one that I liked.

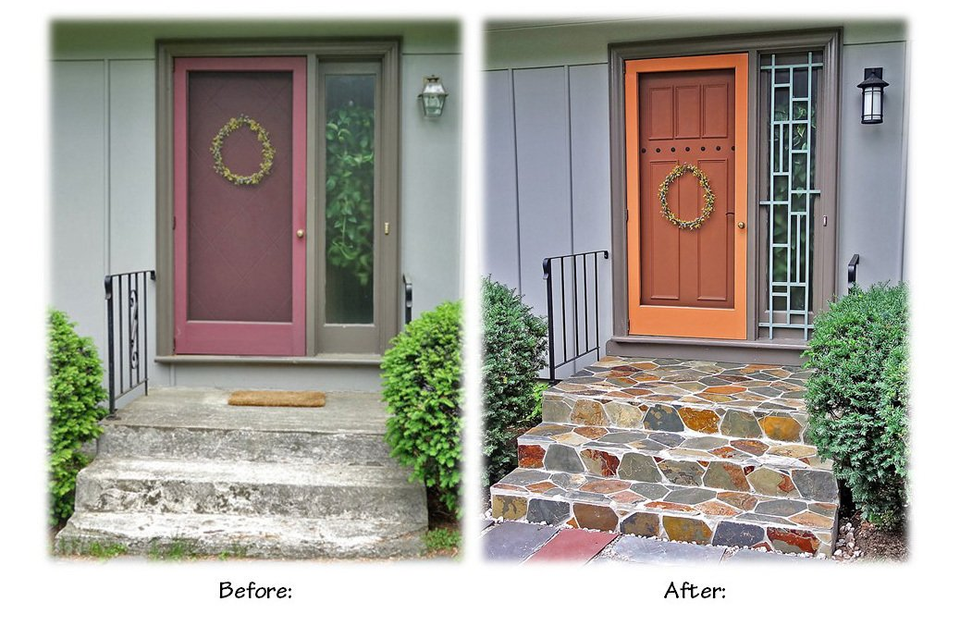
Finished appearance:
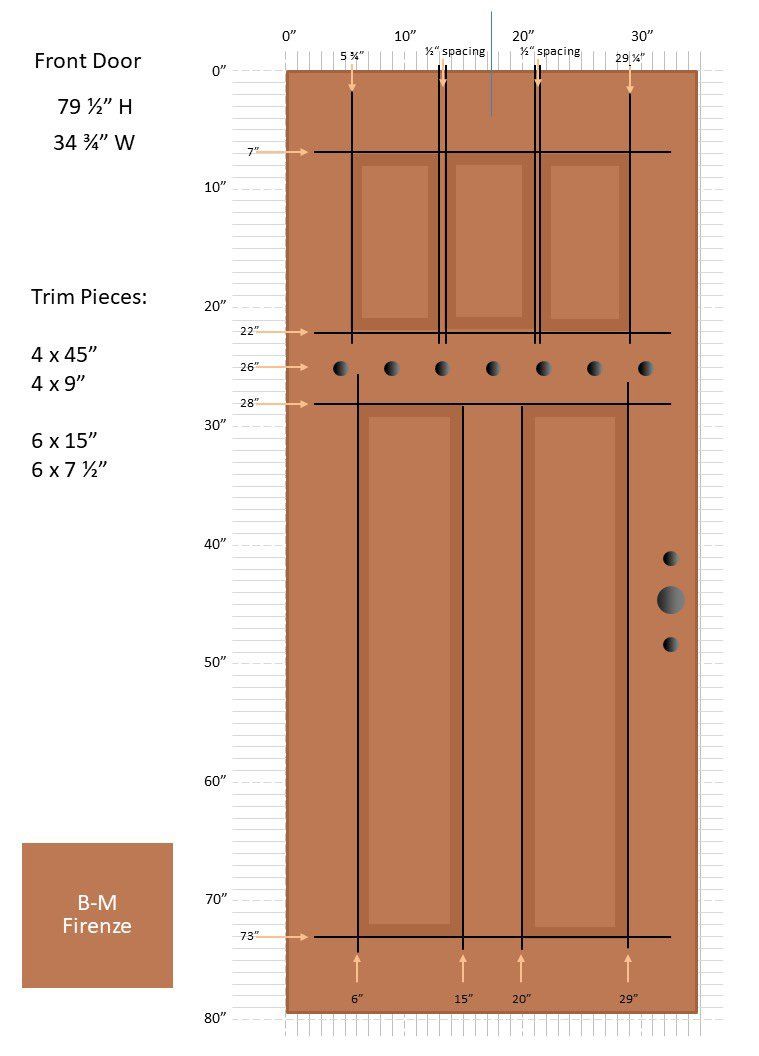
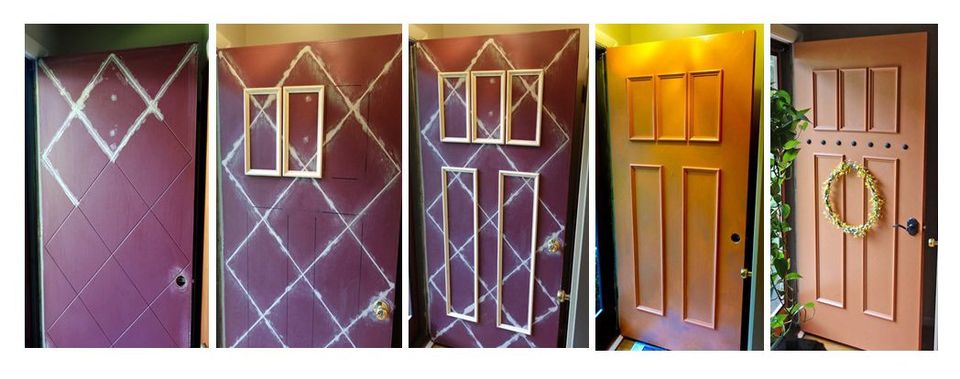
My mid-century, solid wood front door (c.1962) worked just fine but had a dated look. Instead of buying a new, stylish door for around $1,000 plus installation (a fair amount of work), I decided to create a faux paneled look on my existing door using molding, and to add some character, use wrought iron looking clavos (decorative nails). I developed a detailed drawing with very specific dimensions that I could work from (shown just below). I then colored the drawing with the Benjamin Moore color I had chosen (Firenze). As you can see in the four photos below the drawing, I first needed to fill in cross-hatched decorative grooves in the original design before applying the molding.
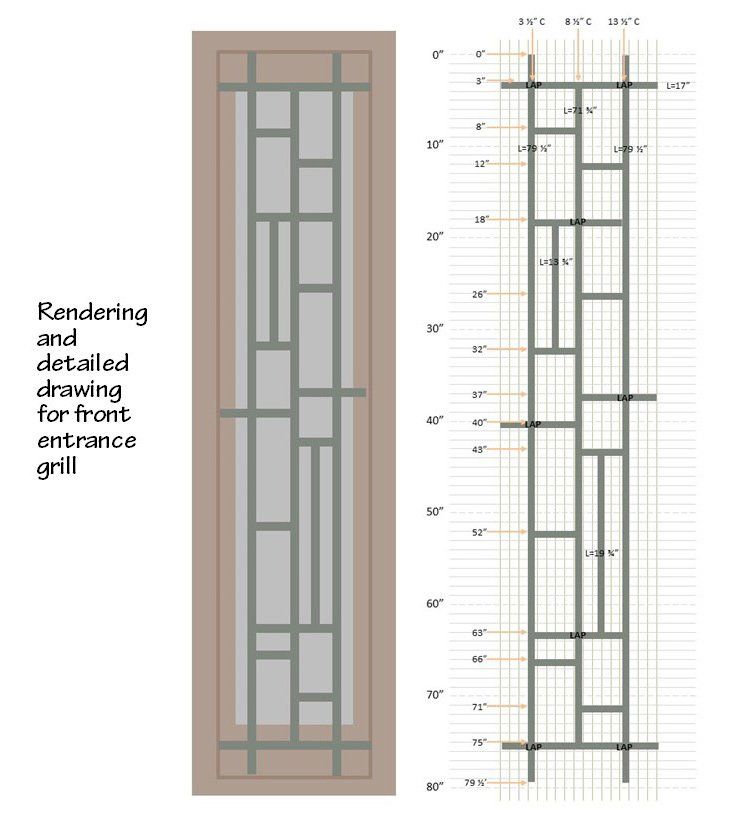
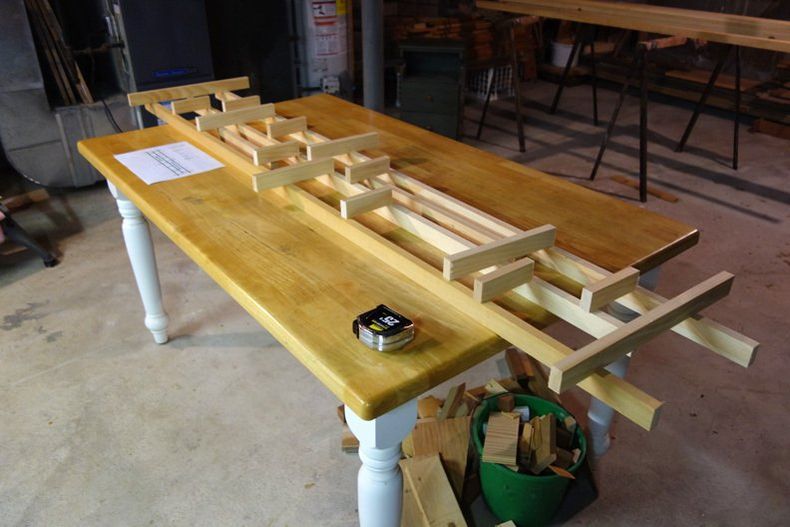
The glass sidelight next to my front door was both a security problem and decorating opportunity. I decided to create a Frank Lloyd Wright style grill, and created both the rendering and detailed working drawing below in Powerpoint.
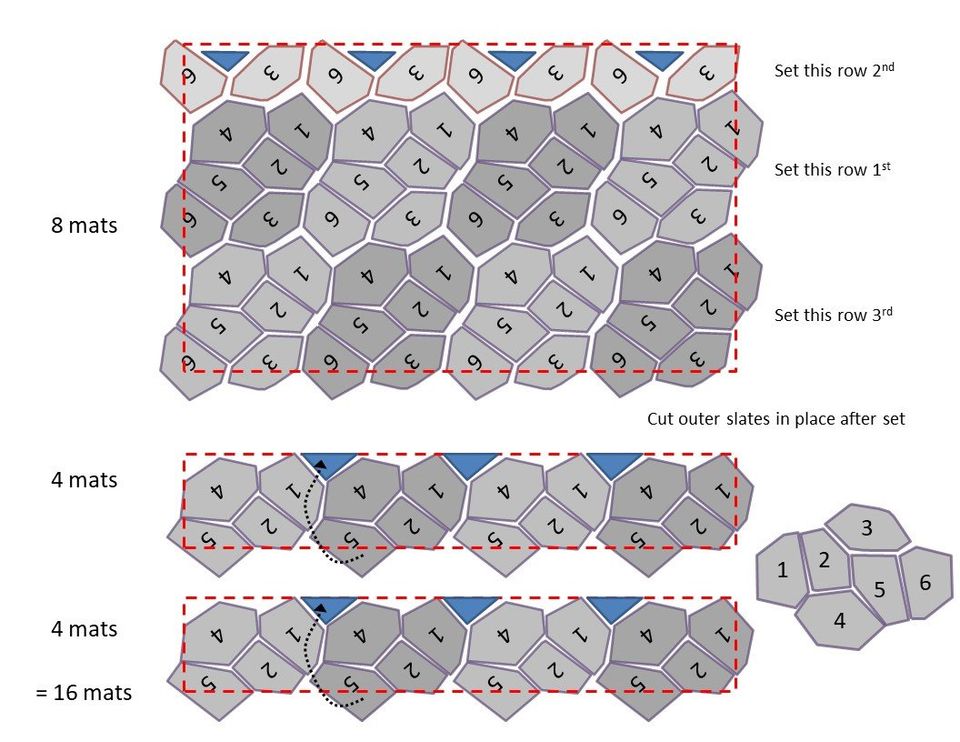
My front steps (poured concrete) were tilting and crumbling. As I liked the look of natural materials, I decided to first level the steps (with concrete) and then add a layer of colorful Santa Barbara slate that I could buy precut and matted on fiberglass mesh in Home Depot. Each matted section had six slates, and were designed to fit side-by-side in creating a patio. I created the following drawing in Powerpoint to figure out how to place the matted slates on my stoop and two steps. I used leftover slates on the three front facing risers. As I had never cut slate before, I searched on YouTube for some advice, and found a how-to video by a roofer in Wales, which has a lot of slate roofs. For medium thickness slates, the proper tool I learned is an angle grinder (about $100) with a diamond tipped circular blade (as shown in the photo at the bottom right).
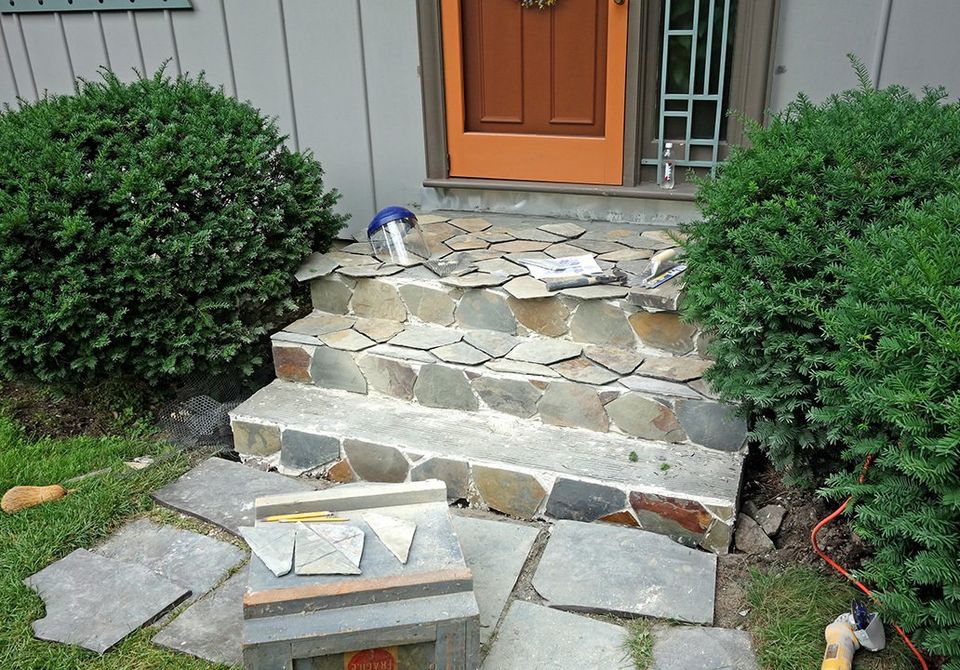
I was pleased with the result! As you can see, I also got a new front light and cut out the curly sections of the wrought iron railing.