Deck Railings
< Updating a Deck Railing from Traditional to Contemporary >
Since I built my deck 30 years ago with a traditional wooden railing, sleek stainless steel cable railings have emerged. Since my deck needed staining, and I hate cleaning and staining all those wooden balusters, I decided it was time for a change. A lot of stainless railing hardware is pretty pricey, but I found some (on Amazon, of course) that was more affordable. The cost for the hardware, cable, and tools came to about $250. Plus a gallon a stain for the deck, and the project was done for less than $300. All in all, the project was a win-win-win: better view, sleeker look, lower maintenance.
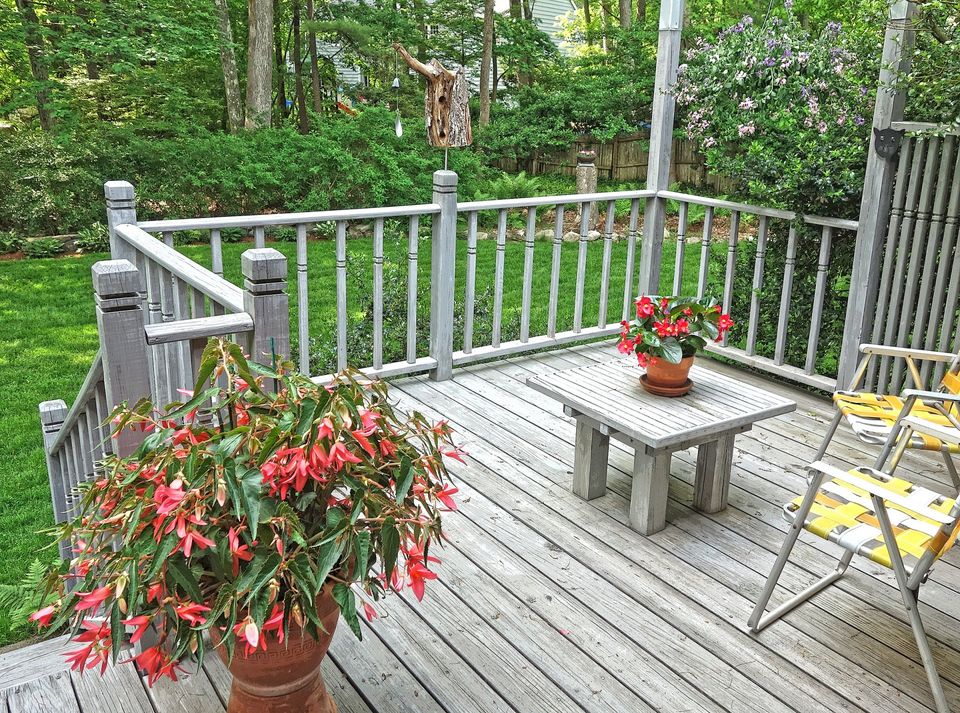
Here's the original design. Pretty nice for its day, but the railings are high maintenance and the view is blocked quite a bit when in a sitting position. I wanted to feel more immersed "in my yard" when sitting on my deck as opposed to looking "at my yard."
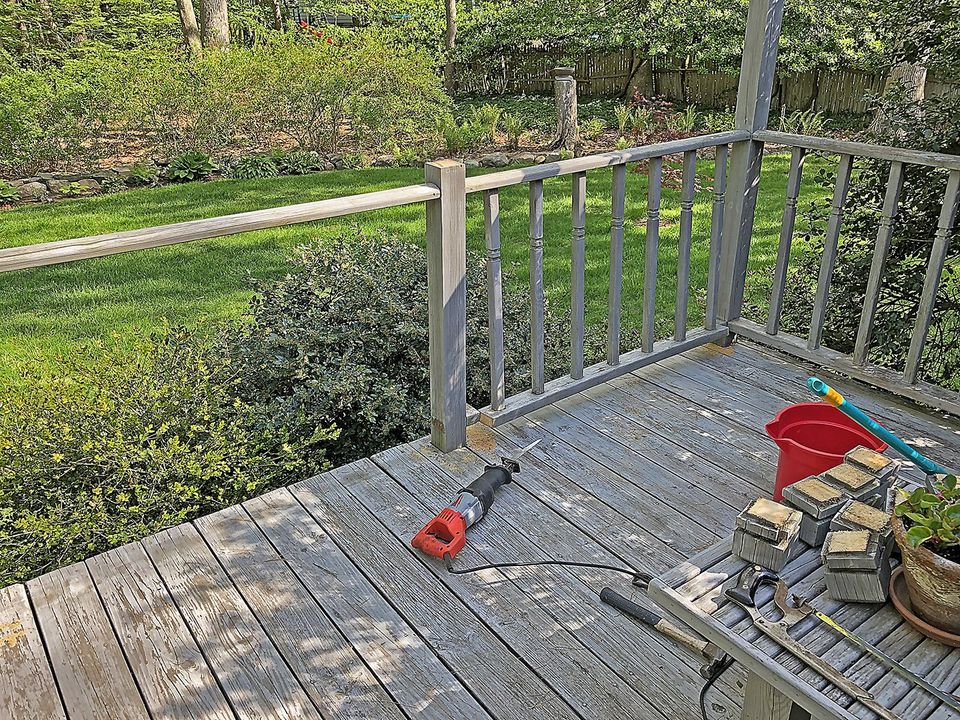
Step 1: I Cut the lower horizontal member of the railing at both ends and separated the balusters from the top horizontal member. I also cut off the post tops for replacement later with new post caps that I made. Note: a solid horizontal member on top is necessary for people to lean on as well as to keep the cable tension from pulling the posts off vertical.
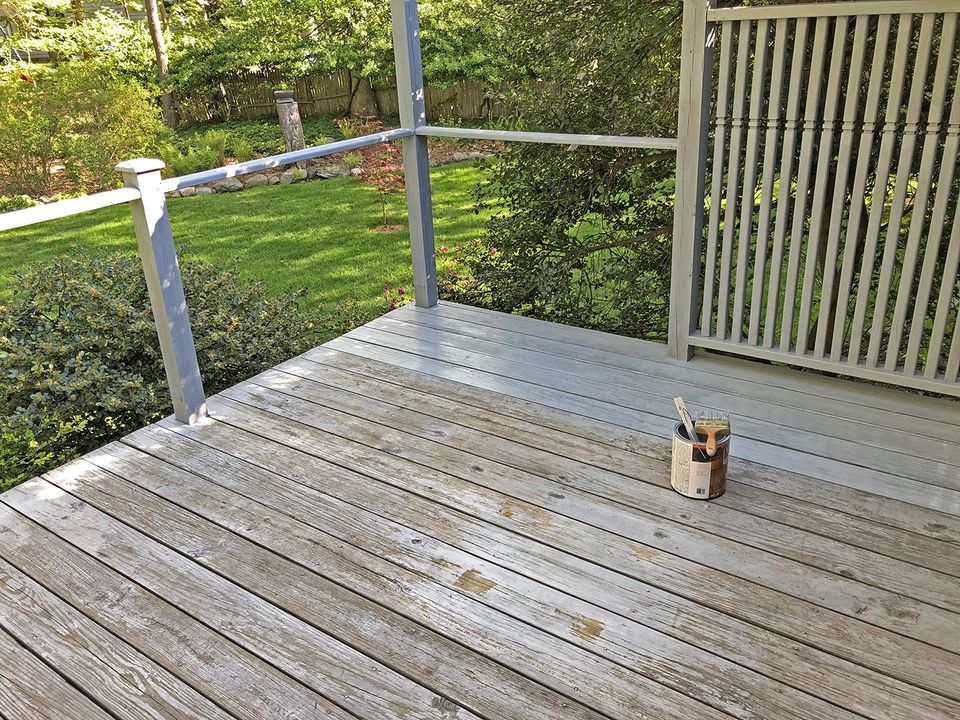
Step 2: After removing the balusters, I cleaned the wood with a bleach and water solution. When the wood was dry, I began staining with a semi-transparent stain. You can see that I retained the tall balusters (no view there). Staining them took as much time as everything else! You can also see here the new post cap that I installed. I made them from some 1x6 pressure treated wood that I had. I beveled them on a band saw.
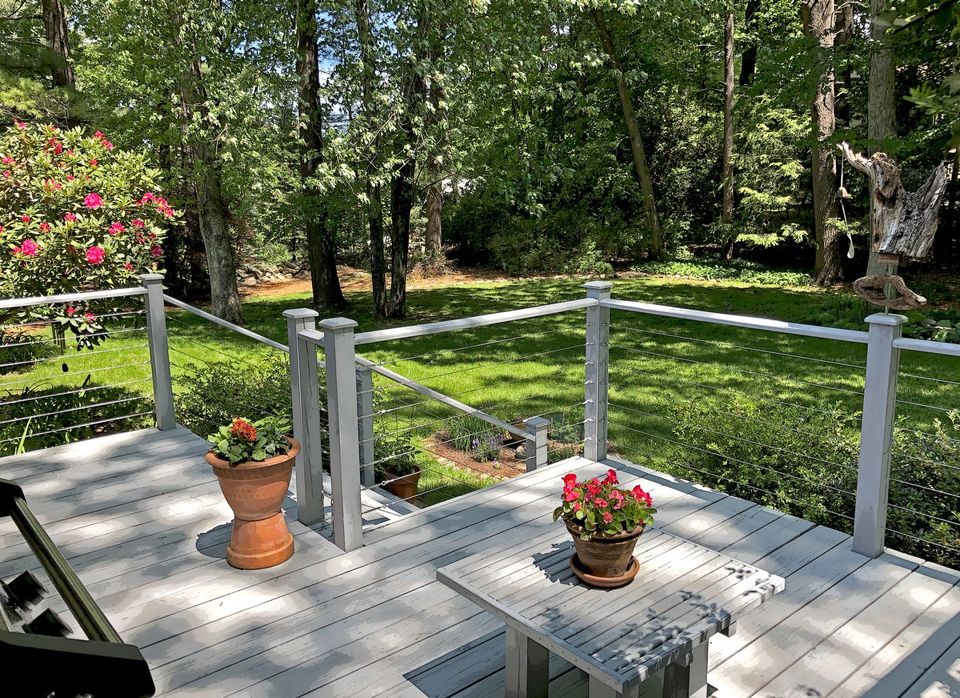
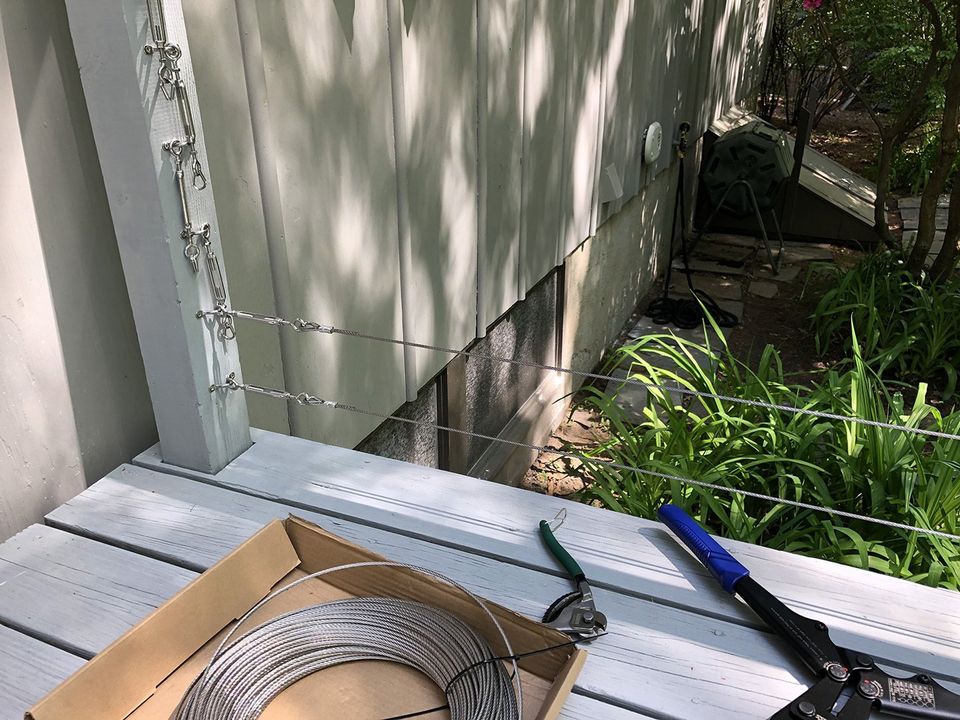
Step 3: The stainless hardware and cable installation is next. The typical code for stainless railings is a 4" separation. The cable (1/8") is fixed at each end with a crimped ferrule. The crimper is the large tool show with the blue handle. The smaller tool with the green handle is for cutting the cable. Each cable run is tightened with the turnbuckle shown attached to the post on the left.
Step 4: Enjoy! I knew that I would like the new design, but I find that I like it even more than expected as the better view does provide much more of a feeling of being immersed in nature.
One technical point, between the two posts that are close together (10" gap) at the top of stairs, I used two vertical cables as opposed to 7 horizontal ones.